")

")
")
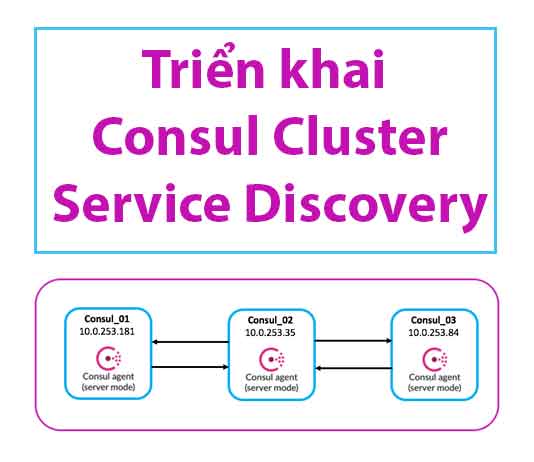
Hướng dẫn triển khai Consul Cluster – Service Discovery – Cuongquach.com | Consul là một trong những Open Source về giải pháp Service Discovery khá là thú vị và nổi gần đây. Một trong những bước đầu để có thể thiết kế một hệ thống Service Discovery đó là xây dựng một hạ tầng Consul Cluster đảm bảo tính HA cho hệ thống, hoạt động ổn định,… Trong bài viết này chúng ta sẽ tìm hiểu cách xây dựng một cụm phân tán Consul Cluster cho hoạt động Service Discovery.
Contents
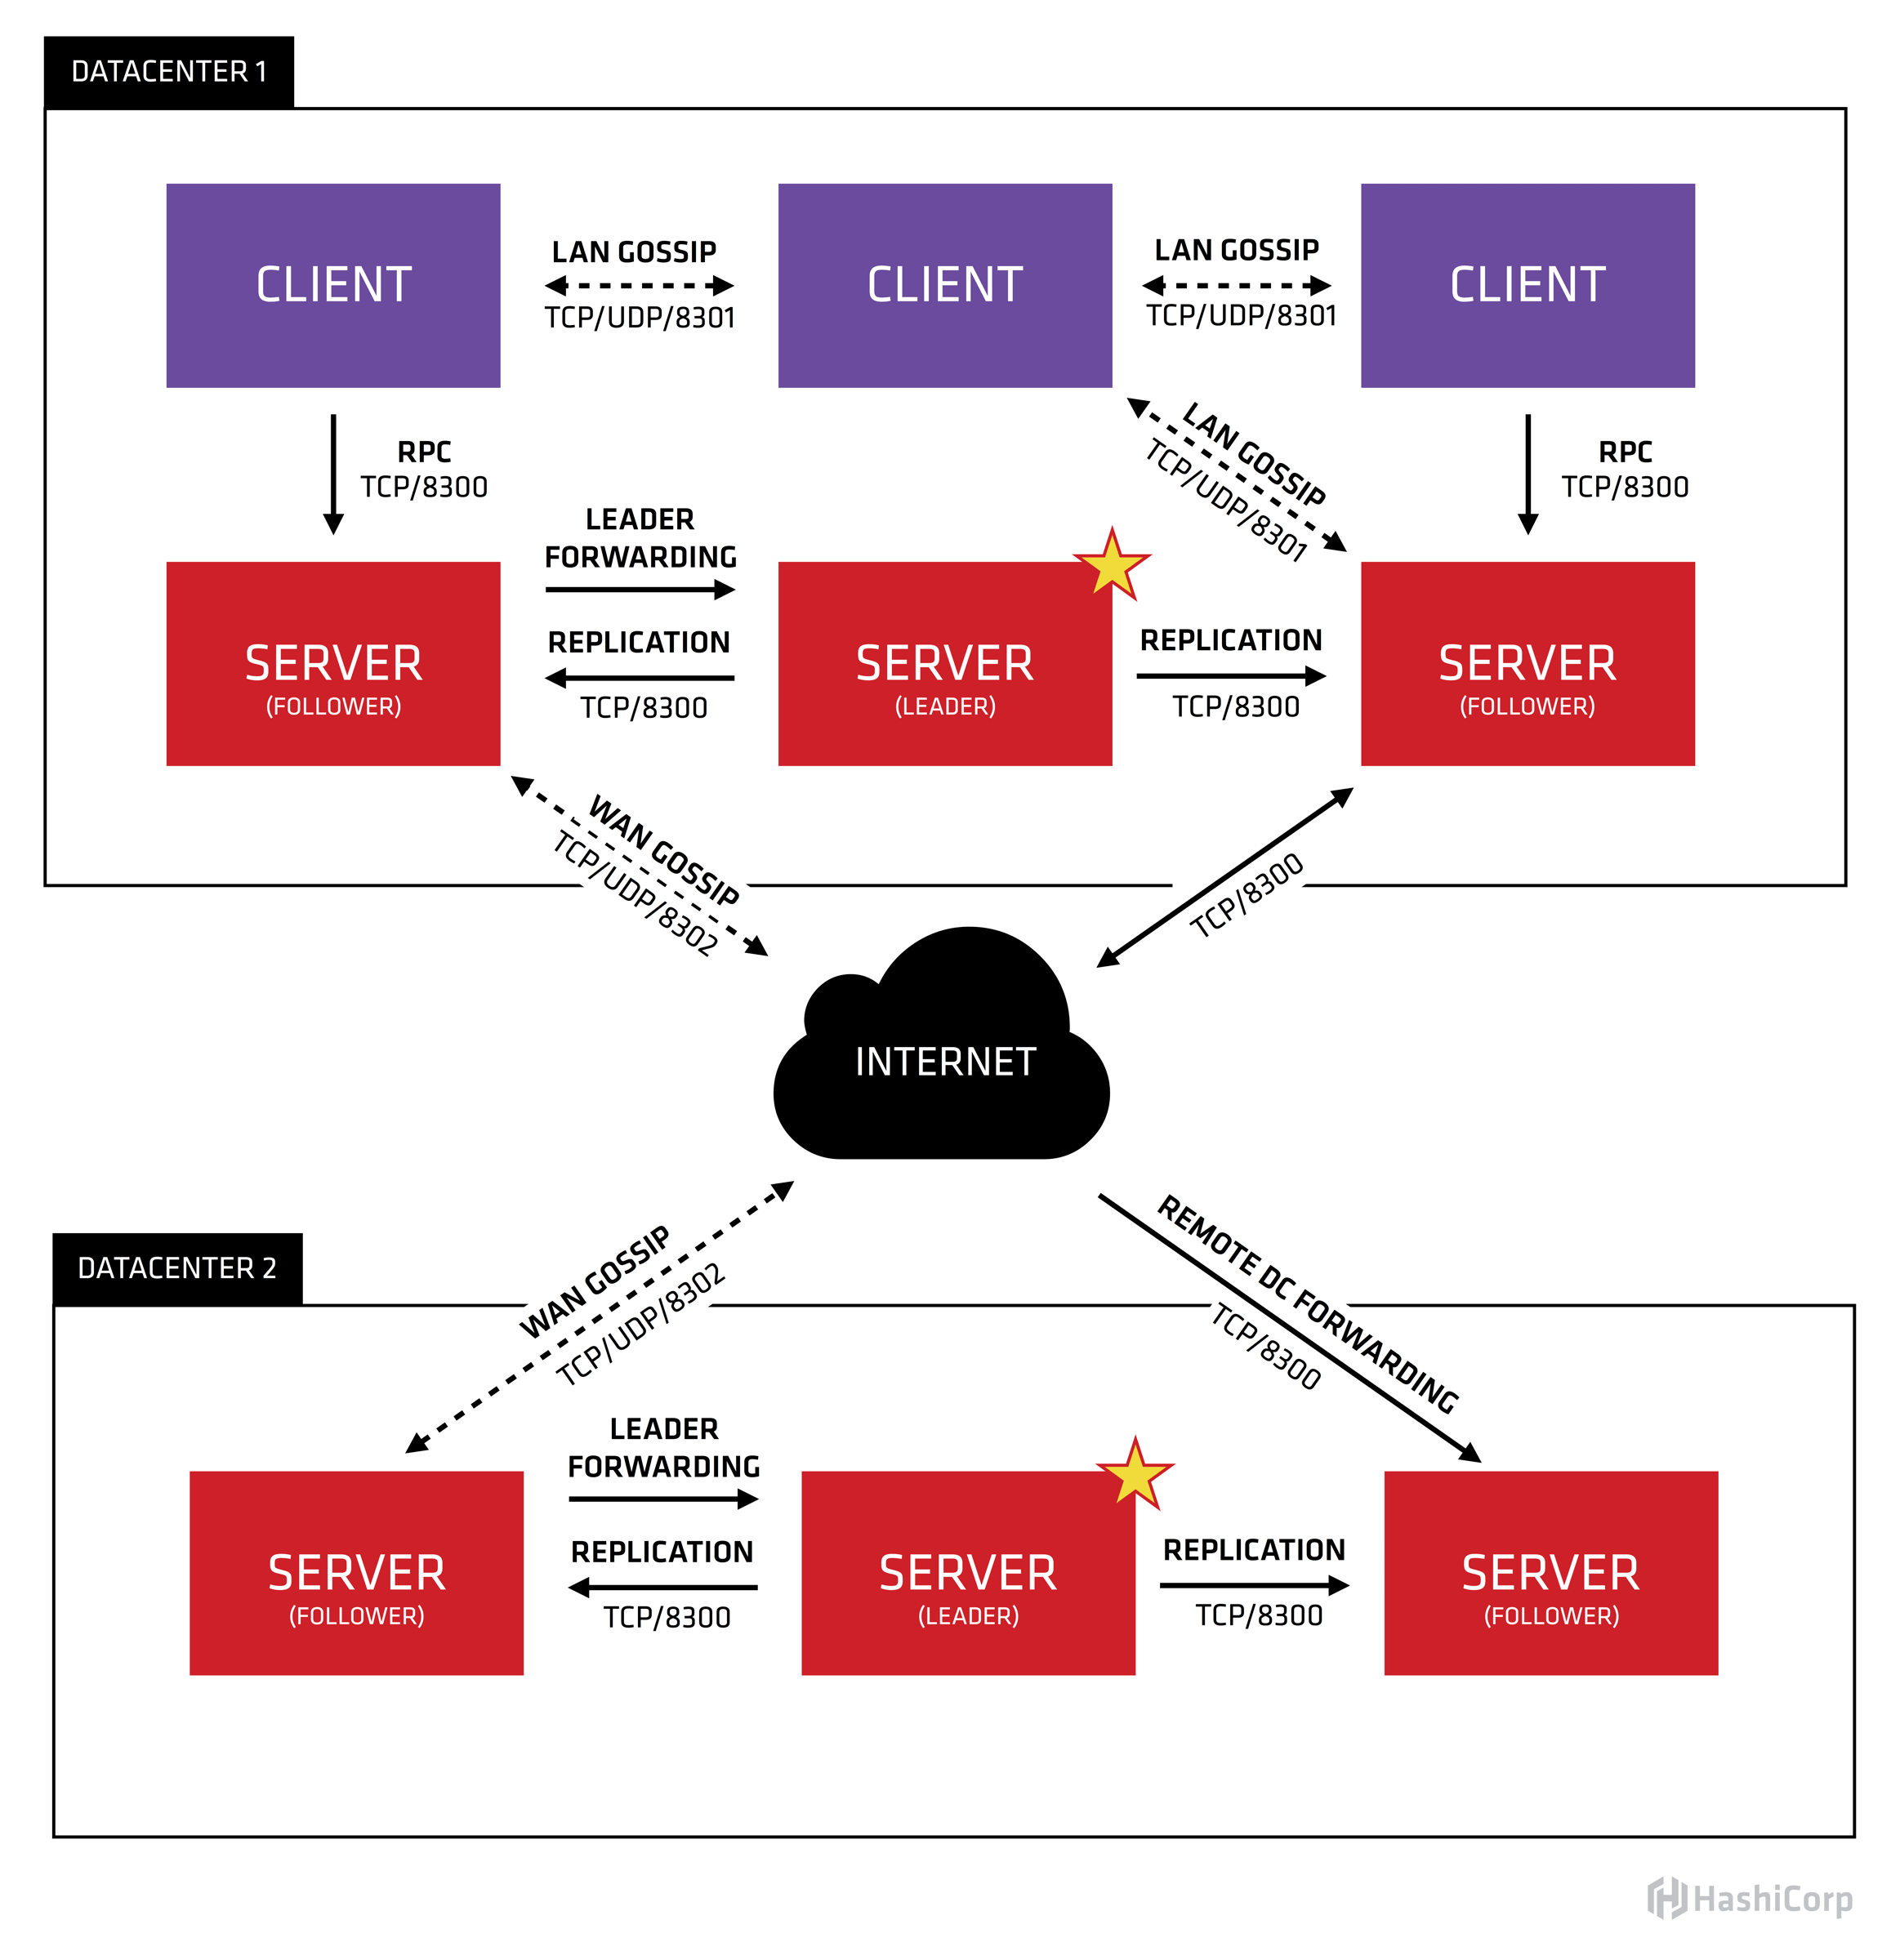
Consul Cluster hoạt động như thế nào ?
Một cụm cluster Consul cần tối thiểu là 3 server , tại sao 3 server thì là để tránh vấn đề ‘Split Brain‘ thường gặp khi setup các hệ thống dịch vụ Cluster. Các Server Consul ở Server Mode và Client Mode sẽ nói chuyện với nhau qua giao thức riêng port 8300, 8301 trong DataCenter Private.
Chi tiết Consul Cluster hoạt động như thế nào, bạn có thể tham khảo bài viết này : https://www.consul.io/docs/internals/index.html
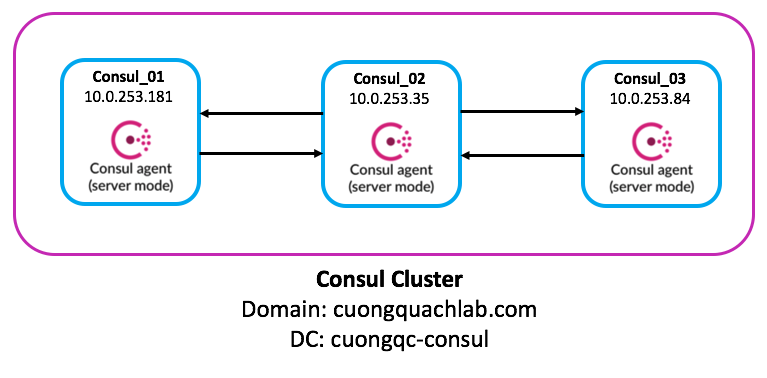
Mô hình lab Consul Cluster
Giả định mô hình Consul Cluster của chúng ta gồm thông tin 3 máy chủ Consul với các địa chỉ IP Private như sau .
consul-01 10.0.253.181
consul-02 10.0.253.35
consul-03 10.0.253.84
Bạn cần cấu hình hostname cho các máy chủ Consul với cú pháp lệnh dưới bạn tự tuỳ biến [0x] thành tên hostname của các máy chủ khác.
# hostnamectl set-hostname consul-0x --static
Kế đến nhớ tắt SELinux trên CentOS nếu bạn không làm chủ được tính năng này.
# setenforce 0
# sed -i 's/^SELINUX=.*/SELINUX=disabled/g' /etc/selinux/config
Danh sách port cần mở giữa 3 server Consul Cluster để giao tiếp với nhau:
- TCP : 8300,8301,8302,8400,8500,8600
- UDP : 8301,8302,8600
1. Cài đặt Consul trên Linux
Đầu tiên chúng ta sẽ tải chương trình Linux Consul binary về : https://www.consul.io/downloads.html
# yum install wget unzip -y
# cd /opt/
# wget https://releases.hashicorp.com/consul/1.5.2/consul_1.5.2_linux_amd64.zip
Giải nén file zip và di chuyển chương trình ‘consul‘ đến thư mục chứa các binary chung.
# unzip consul_1.5.2_linux_amd64.zip
# rm -f consul_1.5.2_linux_amd64.zip
# mv consul /usr/bin/
# chmod +x /usr/bin/consul
# ll /usr/bin/consul
-rwxr-xr-x 1 root root 106903403 Jun 28 06:00 /usr/bin/consul
Kiểm tra chương trình ‘consul‘ xem phiên bản bao nhiêu để biết ‘consul‘ hoạt động được chưa nhé.
# consul -v
Consul v1.5.2
Protocol 2 spoken by default, understands 2 to 3 (agent will automatically use protocol >2 when speaking to compatible agents)
Xem mục trang giúp đỡ của ‘consul‘ nào.
# consul --help
Usage: consul [--version] [--help] <command> [<args>]

Available commands are:
acl Interact with Consul's ACLs
agent Runs a Consul agent
catalog Interact with the catalog
config Interact with Consul's Centralized Configurations
connect Interact with Consul Connect
debug Records a debugging archive for operators
event Fire a new event
exec Executes a command on Consul nodes
force-leave Forces a member of the cluster to enter the "left" state
info Provides debugging information for operators.
intention Interact with Connect service intentions
join Tell Consul agent to join cluster
keygen Generates a new encryption key
keyring Manages gossip layer encryption keys
kv Interact with the key-value store
leave Gracefully leaves the Consul cluster and shuts down
lock Execute a command holding a lock
login Login to Consul using an auth method
logout Destroy a Consul token created with login
maint Controls node or service maintenance mode
members Lists the members of a Consul cluster
monitor Stream logs from a Consul agent
operator Provides cluster-level tools for Consul operators
reload Triggers the agent to reload configuration files
rtt Estimates network round trip time between nodes
services Interact with services
snapshot Saves, restores and inspects snapshots of Consul server state
tls Builtin helpers for creating CAs and certificates
validate Validate config files/directories
version Prints the Consul version
watch Watch for changes in Consul
Khởi tạo user hoạt động cho dịch vụ ‘consul‘ nào.
# groupadd --system consul
# useradd -s /sbin/nologin --system -g consul consul
Khởi tạo thư mục cần thiết cho Consul gồm :
– Thư mục cấu hình cho chương trình dịch vụ Consul.
– Thư mục chứa dữ liệu hoạt động của dịch vụ Consul.
– Thư mục chứa log của dịch vụ Consul.
# mkdir -p /etc/consul.d/ /var/lib/consul/ /var/log/consul/
Kế đến phân quyền truy cập các thư mục trên cho user ‘consul’ nào.
# chown -R consul:consul /var/lib/consul/ /etc/consul.d/ /var/log/consul/
# chmod -R 775 /var/lib/consul/ /etc/consul.d/ /var/log/consul/
Kế đến chúng ta mapping domain với địa chỉ IP các máy chủ Consul sẽ khởi tạo Cluster để tiện quản lý. Bạn có thể sử dụng dịch vụ DNS Server Private của hệ thống bạn hoặc map đơn giản trong file ‘hosts‘.
# vi /etc/hosts
consul-01.gotadi.private 10.0.253.181
consul-02.gotadi.private 10.0.253.35
consul-03.gotadi.private 10.0.253.84
2. Khởi tạo key Consul Secret
Phần này bạn chỉ cần chạy trên 1 con để khởi tạo Consul secret key sử dụng cho config key encrypt Consul của các con Consul 01, 02 và 03. Key encrypt này giúp mã hoá và giải mã các message trao đổi giữa các máy chủ Consul.
# consul keygen
JLhmGJlwxZKtOLv4h6t26w==
3. Cấu hình dịch vụ Consul Cluster
Bạn sử dụng nội dung Consul Secret trên để thế vào phần biến ‘encrypt‘ trong file cấu trên cả 3 Consul server. Trong bài lab này mình thay thế bằng domain nội bộ hệ thống tương ứng địa chỉ IP private của các máy chủ Consul để quản lý đẹp hơn.
Lưu ý:
- Các thao tác dưới đều thực hiện riêng trên cả 3 máy chủ Consul, nhưng nội dung từ file config đến thao tác đều giống nhau nhé.
# cat /etc/hosts
consul-01.gotadi.private 10.0.253.181
consul-02.gotadi.private 10.0.253.35
consul-03.gotadi.private 10.0.253.84
+ Consul 01, Consul 02, Consul 03
# vi /etc/consul.d/config.json
{
    "bootstrap_expect": 3,
    "client_addr": "0.0.0.0",
    "datacenter": "cuongqc-consul",
    "data_dir": "/var/lib/consul/",
    "domain": "cuongquachlab.com",
    "enable_script_checks": true,
    "dns_config": {
        "enable_truncate": true,
        "only_passing": true
    },
    "enable_syslog": true,
    "encrypt": "JLhmGJlwxZKtOLv4h6t26w==",
    "leave_on_terminate": true,
    "log_level": "INFO",
    "log_file": "/var/log/consul/consul.log",
    "rejoin_after_leave": true,
    "server": true,
    "start_join": [
        "consul-01.gotadi.private",
        "consul-02.gotadi.private",
        "consul-03.gotadi.private"
    ],
    "retry_join": [
        "consul-01.gotadi.private",
        "consul-02.gotadi.private",
        "consul-03.gotadi.private"
    ],
    "ui": true
}
Chú thích cấu hình:
- bootstrap_expect : số lượng Consul mode Server cần có để chạy trong một data center Consul Cluster.
- client_addr : địa chỉ IP mà Consul sẽ listen interface, bao gồm các dịch vụ HTTP và DNS.
- datacenter : quy định thông tin tên Cluster Data Center hoạt động, giả sử có nhiều cụm Cluster name khác nhau, thì tương ứng các datacenter name khác nhau. Các consul server phải cùng hoạt động chung 1 data center và 1 domain.
- data_dir : thư mục chứa dữ liệu hoạt động của Consul.
- domain : mặc định Consul sẽ xử lý các query dns đến domain ‘consul.’ . Bạn có thể tuỳ biến domain riêng cho hệ thống nội bộ, khớp với domain các dịch vụ trong mạng nội bộ của bạn.
- enable_script_checks : kích hoạt sử dụng cơ chế health check qua script.
- dns_config : một số option tinh chỉnh cho service DNS Consul Server.
- enable_syslog : kích hoạt syslog cho Consul.
- encrypt : chuỗi kí tự dùng để mã hoá trao đổi cơ bản giữa các Consul member trong Consul Cluster.
- log_level : cấp độ log được ghi lại.
- log_file : thông tin file log dịch vụ Consul ghi log.
- rejoin_after_leave : kích hoạt cho option ‘retry_join’.
- server : chạy Consul Agent ở chế độ Server, thay vì Client Mode.
- start_join : danh sách các máy chủ mà Consul Agent cần
- retry_join : thử join vào danh sách các máy chủ trong cụm Cluster Consul, nếu lần đầu ‘start_join‘ bị thất bại.
- ui : kích hoạt giao diện dashboard quản lý consul.
Kiểm tra cấu hình Consul đúng cú pháp chưa.
# consul validate /etc/consul.d/config.json
Configuration is valid!
Kế đến tạo file khởi động dịch vụ Consul.
# vi /etc/systemd/system/consul.service
[Unit]
Description=Consul Service Discovery Agent
Documentation=https://www.consul.io/
After=network-online.target
Wants=network-online.target

[Service]
Type=simple
User=consul
Group=consul
ExecStart=/usr/bin/consul agent -config-dir=/etc/consul.d/
ExecReload=/bin/kill -HUP $MAINPID
KillSignal=SIGINT
TimeoutStartSec=0
TimeoutStopSec=5
Restart=on-failure
SyslogIdentifier=consul

[Install]
WantedBy=default.target
Chúng ta reload lại dịch vụ system, để cập nhật mới thông tin file service systemd vừa tạo.
# systemctl daemon-reload
Giờ bạn cần thêm rule firewall trên máy chủ dịch vụ Consul để thêm các port hoạt động quan trọng của Consul Cluster.
+ Firewalld
# firewall-cmd --add-port={8300,8301,8302,8400,8500,8600}/tcp --permanent
# firewall-cmd --add-port={8301,8302,8600}/udp --permanent
# firewall-cmd --reload
+ Iptables
# iptables -I INPUT -p tcp --match multiport --dports 8300,8301,8302,8400,8500,8600 -j ACCEPT
# iptables -I INPUT -p udp --match multiport --dports 8301,8302,8600 -j ACCEPT
+ Security Group AWS
Nếu bạn cấu hình trên EC2 Instance của dịch vụ Cloud AWS, thì nhớ thêm rule trên Security Group firewall nha, với chi tiết rule :
- TCP : 8300,8301,8302,8400,8500,8600
- UDP : 8301,8302,8600
4. Bootstrap và khởi động Consul Cluster
Đầu tiên trên con node Consul-01 , bạn khởi động dịch vụ consul.
# systemctl start consul
Kế đến trên 2 con Consul-02 và Consul-03 , cũng khởi động dịch vụ Consul.
# systemctl start consul
Giờ ta kiểm tra trạng thái của Consul Cluster nào gồm : địa chỉ ip, trạng thái sức khoẻ, phiên bản consul,…
# /usr/bin/consul members
Node Address Status Type Build Protocol DC Segment
gtd-ibe-consul-01 10.0.253.181:8301 alive server 1.5.2 2 cuongqc-consul <all>
gtd-ibe-consul-02 10.0.253.35:8301 alive server 1.5.2 2 cuongqc-consul <all>
gtd-ibe-consul-03 10.0.253.84:8301 alive server 1.5.2 2 cuongqc-consul <all>
Muốn coi thông tin chi tiết hơn thì chạy lệnh option ‘detailed’.
# consul members -detailed
Node Address Status Tags
gtd-ibe-consul-01 10.0.253.181:8301 alive acls=0,build=1.5.2:a82e6a7f,dc=cuongqc-consul,expect=3,id=11f6bc7b-57cd-7ef0-a735-9646b0b042e4,port=8300,raft_vsn=3,role=consul,segment=<all>,vsn=2,vsn_max=3,vsn_min=2,wan_join_port=8302
gtd-ibe-consul-02 10.0.253.35:8301 alive acls=0,build=1.5.2:a82e6a7f,dc=cuongqc-consul,expect=3,id=615594d5-1b8f-48c0-d9ce-7a7c808a12ad,port=8300,raft_vsn=3,role=consul,segment=<all>,vsn=2,vsn_max=3,vsn_min=2,wan_join_port=8302
gtd-ibe-consul-03 10.0.253.84:8301 alive acls=0,build=1.5.2:a82e6a7f,dc=cuongqc-consul,expect=3,id=96f0dd88-361a-b570-772a-d1278ef87082,port=8300,raft_vsn=3,role=consul,segment=<all>,vsn=2,vsn_max=3,vsn_min=2,wan_join_port=8302
5. Truy cập Consul UI
Giờ bạn có thể truy cập Consul Dashboard tại đường dẫn địa chỉ ip bất kì trong 3 con Consul Server và port mặc định là 8500 : http://<consul-ip>:8500/
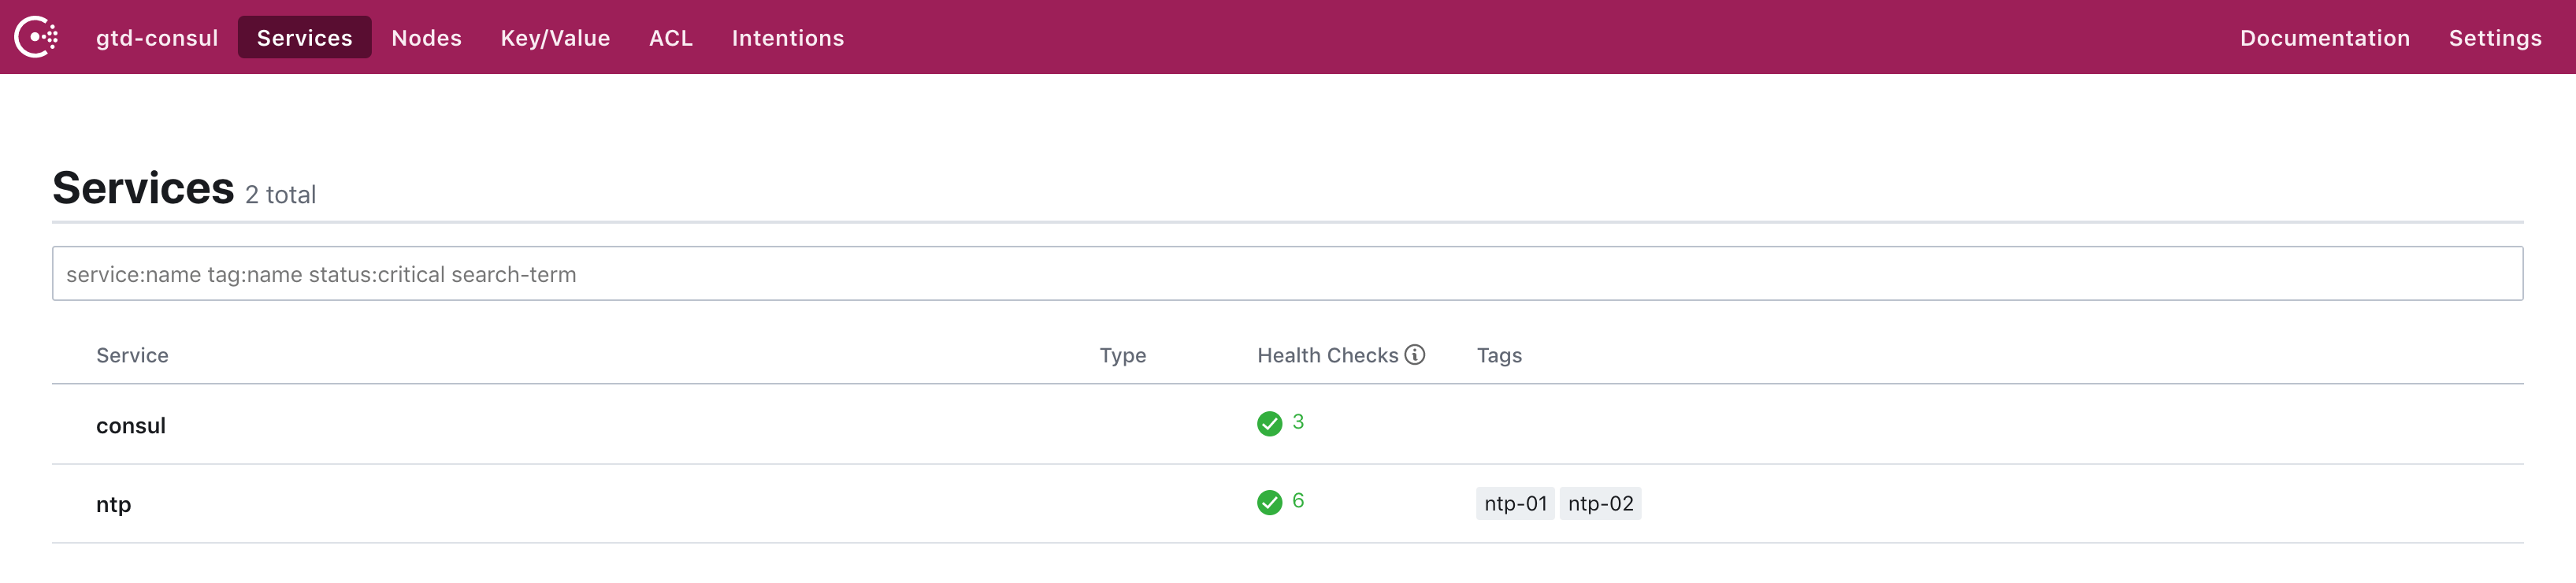

Vậy là bạn đã biết cách triển khai một cụm Consul Cluster cho hoạt động Service Discovery rồi. Chúng ta sẽ còn tiếp tục tìm hiểu quản trị hệ thống Service Discovery Consul nữa.
Nguồn: https://cuongquach.com/
 trên Consul")


")
")
")

")